M A K E S O M E T H I N G B I G
A BOOK CASE / NIGHT TABLE
The idea was to make "something big." For me, most things are "big."I decided to make something useful that I could put in my room and use as a night stand and small bookcase.
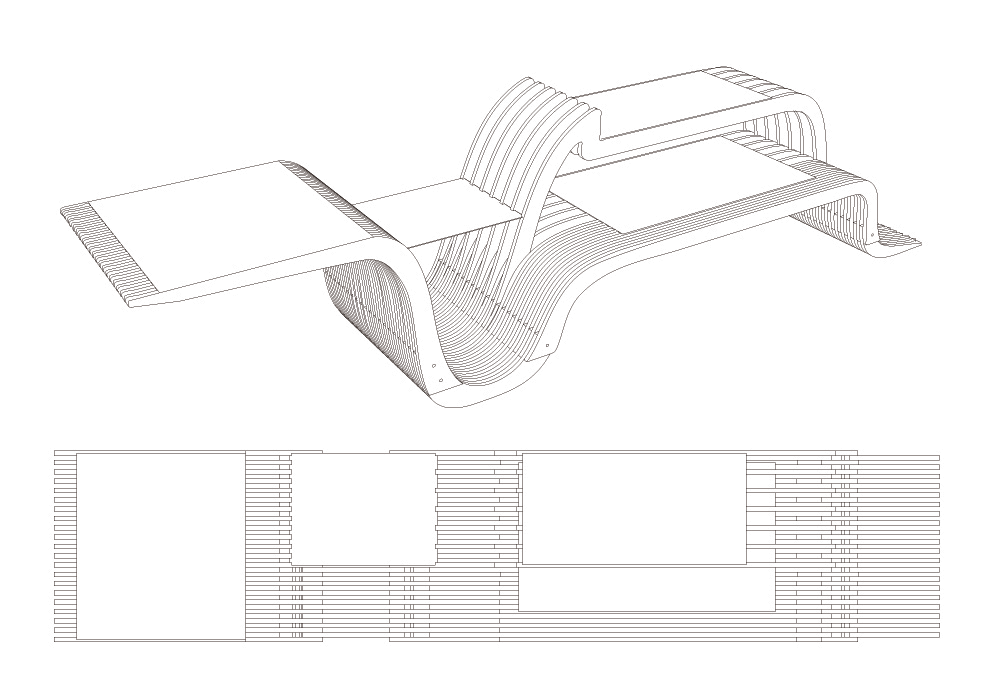
Like most things, I realized I would barely be able to manipulate the stock and eventually not really able to carry the pieces if they were to span the whole profile of the table. I decided then to break it up into manageable pieces that I could more easily carry and assemble. I used the natural 'seams' of the geometry to pick where the piece would be split and overlap into dry joints that would be held together by threaded rods which would then be fastened at the ends with corresponding washers and nuts.
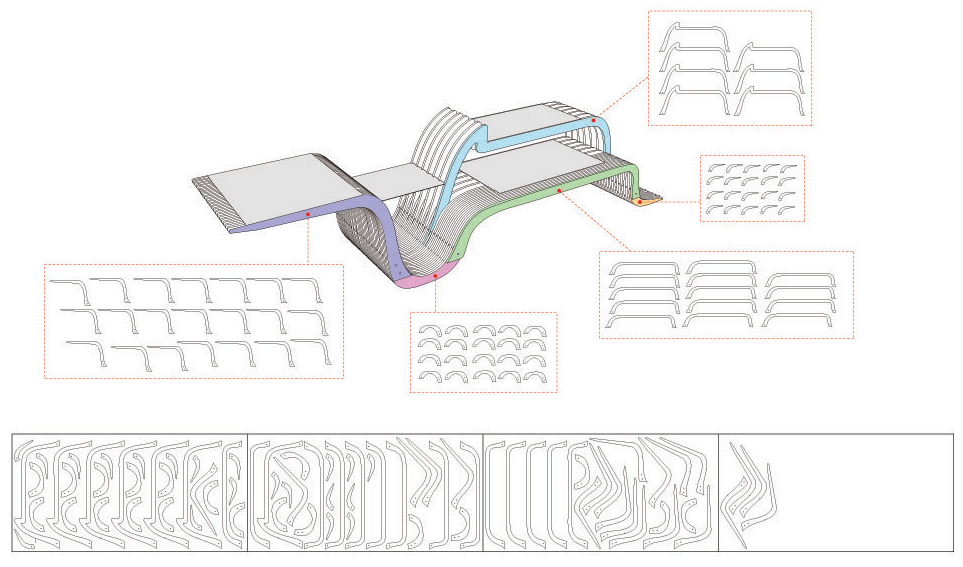
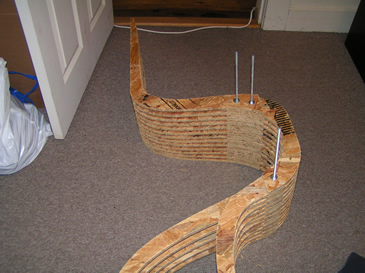
The pieces were held together at three major joints, with a single rod except for the first joint from left to right. Since the left side of the piece was cantilevered, then this first joint would allow the piece to bend unless it was tightened to create enough friction. In order to ensure that the first joint would not bend, I designed it as a two-pin joint. Since books or other things placed on the right portion of the table would create a downward vector, the thought was the last two joints could be single-pin since bending would be minimal.
As soon as I finished the design and nested the pieces in the available stock, I realized that my "something big" was too big. So I decided to make only half of it, but in order to get a more clear idea about what the final piece would look like, I chose to make half the piece of furniture, longitudinally.
So now production starts...
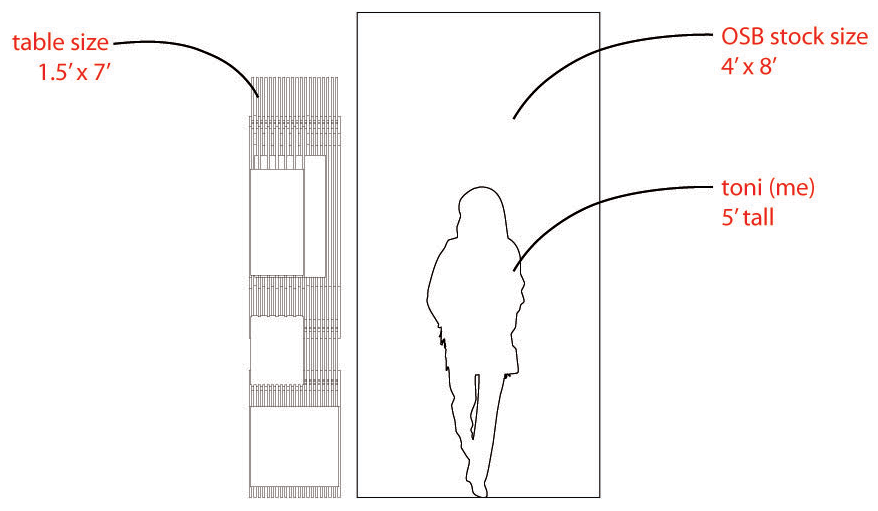
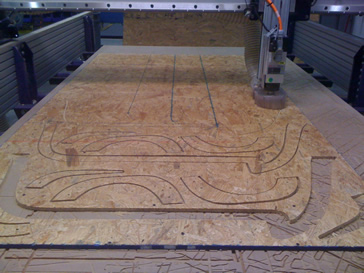
The cutting was done on MIT's CBA Shop Bot with a 1/4 inch bit. The material used for the entire project was 7/16" OSB (oriented strand board). This material is generally used for construction wall sheathing, floor underlayment and roof cover. Since the 'strands' are oriented in opposite directions in the surface and core layers, OSB has almost comparable bending force to that of plywood and therefore, can be used for structural and non-structural applications. Since it is an engineered wood product, it uses smaller diameter trees and thus is less expensive and more environmentally friendly than plywood and other wood products. For a quick guide about OSB click here.
Images of the Shop Bot cutting the first sheet:
The line drawing exported from Rhino is taken into a tool path creation program where all the parameters for the cutting are set. Unlike a laser cutter, CNC milling tool path programs are able to set paths outside the drawn lines so that no kerf-related offsets are necessary in the original files.


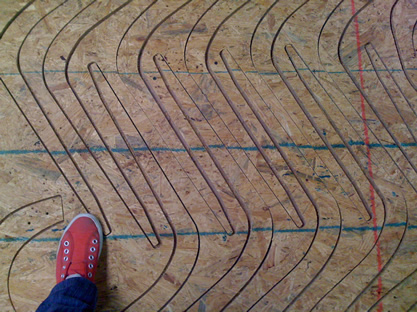
The first sheet is finished...


Cutting the second sheet...


Although the process is pretty simple, and the machine does most of the work once it is programmed with the code for the job, it is very important to keep an eye on what it is doing. As the mill cut through the width of the board, some of the remaining stock lifted up as a result of the natural warping of such a large yet thin material. If this wasn't taken care of, when the mill came back around to continue cutting the long pieces, it would meet the material at an angle and cause undesirable results, possibly including a broken mill. So, to keep the material down, I had to stop the Shop Bot and bolt down the material as it rose up, making sure to not put screws in places where the Shop Bot was due to pass.

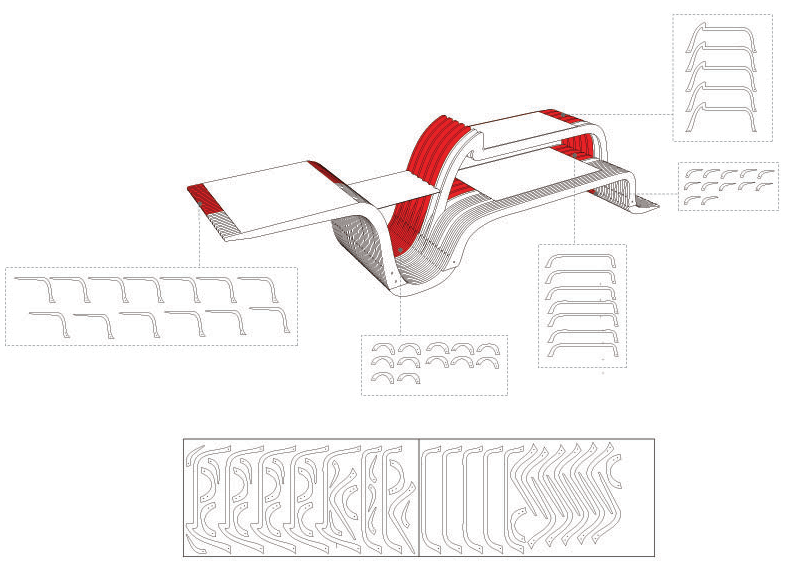
PARTS AND ASSEMBLY
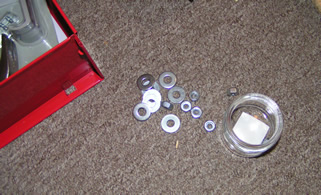
Now that all the pieces were cut to a manageable size, I started the assembly process with the idea to put together the table without the use of glue. My only hardware were four 1/4 in threaded rods cut at 18" (to take into account that the piece will be finished later,) and matching nuts and washers.


Assembly...
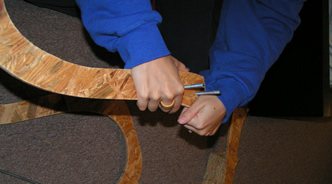


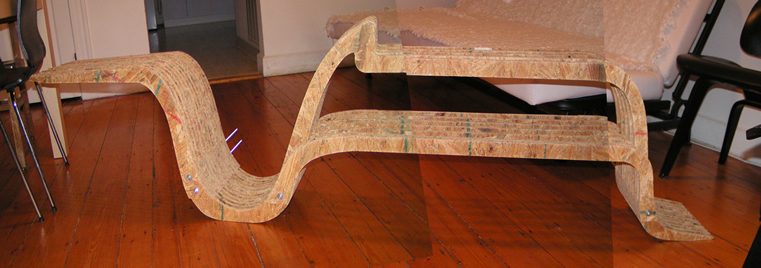
Despite the thought that bending would be minimal, the single-pin joints did allow for significant bending, especially when the cantilever was engaged. In hindsight, I would have probably designed the whole piece with double-pin joints. This is not to say that the piece is not functional, but rather that the cantilever acts more like a lever that I had expected.


The finished first phase, with the 18" pins sticking out for the second phase of the cut and assembly.

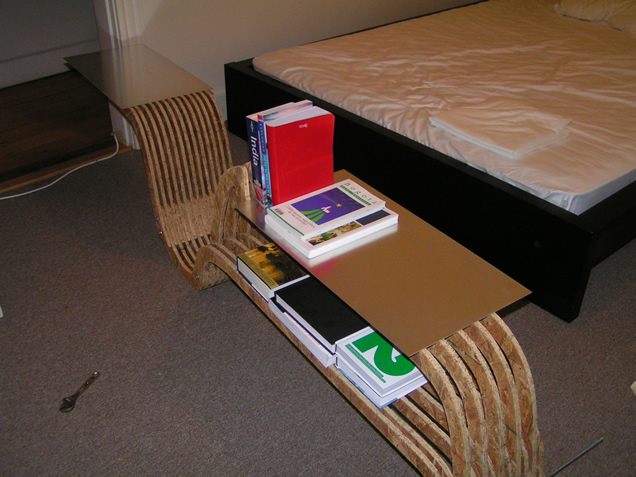
The finished first phase with books on both shelves a the right and with the uncut aluminum covers (these will be cut once the final phase is completed)
LESSONS LEARNED
It would probably be very useful to create a scaled prototype of the piece in order to best test the areas of highest moment.
Whenever deciding to create only part of a piece of furniture, the built piece should be selected in a cross-sectional way that would allow for all possible conditions to be tested before the piece is completed.
OSB is very strong laterally and in compression, but not so much in bending (see bandage on last piece of the higher shelf)
Just because pieces are cut to a manageable size, it does not mean they are not collectively heavier than you might be able to handle.
Account for bit size and other machine tolerances from design conception, that way you won't have to make changes on the fly right before cutting.
H O W T O M A K E ( A L M O S T ) A N Y T H I N G
M A R I A A N ( T O N I ) A B O T E R O